
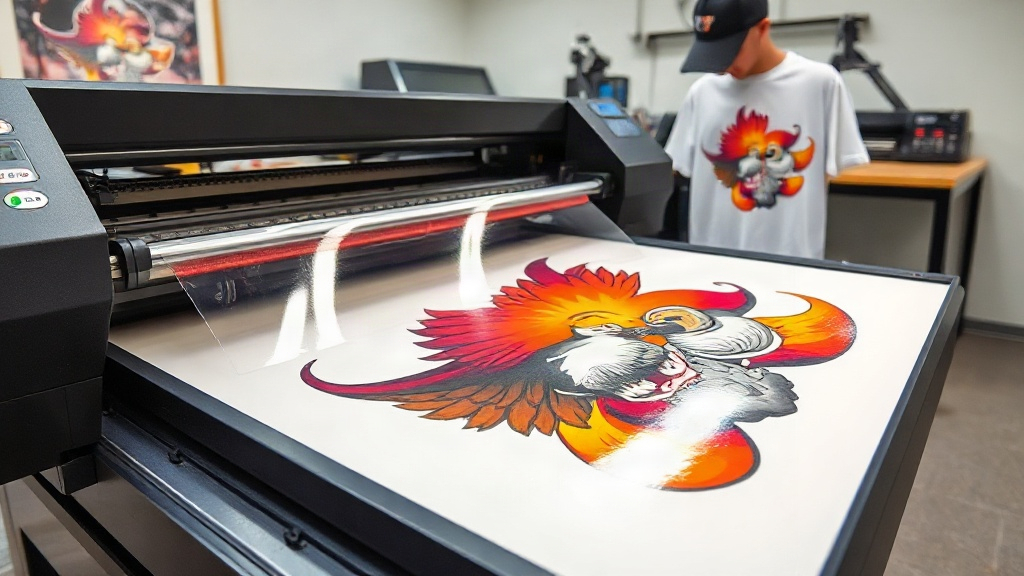
If you've been exploring custom apparel decoration, you've likely encountered DTF printing. Short for Direct to Film, this method has quickly become a favorite among small business owners, crafters, and hobbyists for its ability to produce vibrant, detailed designs on a wide range of fabrics. Unlike screen printing or vinyl cutting, DTF doesn't require weeding, and it works on cotton, polyester, blends, and even treated nylon. In this guide, I'll walk you through the entire DTF process, share practical tips I've learned from countless transfers, and help you avoid common pitfalls.
What Exactly Is DTF Printing?
DTF printing is a digital printing technique where your design is printed onto a special PET film using water-based pigment inks. After printing, a thermoplastic powder (often called hot melt adhesive) is applied to the wet ink while it's still on the film. The powder sticks to the ink, and then the film goes through a curing process to melt the powder into a flexible, adhesive layer. Once cured, the transfer is ready to be applied to a garment using a heat press. The result is a soft, stretchable print that bonds permanently to the fabric.
Why DTF Stands Out
One of the biggest advantages of DTF is its versatility. You can print full-color images with gradients, fine lines, and photographic details without worrying about color separation or minimum order quantities. It's also more forgiving on fabric types than heat transfer vinyl (HTV), which often struggles with stretchy or tightly woven materials. Plus, because the adhesive is applied separately, the print feels less plasticky than some other transfer methods.
The DTF Printing Process Step by Step
Getting a flawless DTF transfer involves several stages. Here's a breakdown of each step, along with practical advice to get it right the first time.
1. Design Preparation
Start with a high-resolution image (300 DPI is ideal). Mirror the design horizontally before printing, because the film will be flipped when pressed onto the garment. If your design has a lot of white areas, you'll need to print a white ink layer underneath the color layers. Most DTF printers handle this automatically, but it's worth checking your printer settings.
2. Printing onto PET Film
Load your DTF film into the printer, making sure the coated side faces the printhead. The film comes in rolls or sheets, and you can choose between hot peel and cold peel varieties. Hot peel films allow you to remove the carrier sheet while the transfer is still warm, which speeds up production. Cold peel films require the transfer to cool completely before peeling, often resulting in a slightly smoother finish. I prefer hot peel for most jobs because it saves time and reduces the risk of the film curling.
3. Powder Application
While the ink is still wet, sprinkle the DTF powder evenly over the design. You can do this manually or use a shaker machine for consistency. Gently shake off the excess powder, then tap the film to ensure an even coating. The powder should stick only to the ink, not to the clear areas of the film. If you see powder where it shouldn't be, you can brush it off with a soft brush before curing.
4. Curing the Powder
Curing melts the powder into a smooth, adhesive layer. You can use a heat press, a dedicated curing oven, or even a modified toaster oven. The ideal temperature is around 320°F to 350°F (160°C to 175°C) for 2 to 3 minutes. Overcuring can make the transfer brittle, while undercuring leaves the powder grainy and prone to washing off. I recommend using an infrared thermometer to verify the actual temperature, as oven dials can be inaccurate.
5. Heat Press Application
Set your heat press to 325°F (160°C) with medium pressure. Pre-press the garment for a few seconds to remove moisture. Place the DTF transfer on the fabric with the powder side down, then press for 15 to 20 seconds. If you're using a hot peel film, peel the carrier sheet immediately in a smooth, consistent motion. For cold peel, wait until the transfer cools completely before peeling. After peeling, you can do a second press with a Teflon sheet for 5 to 10 seconds to enhance durability and smoothness.
Common Challenges and How to Solve Them
Even with experience, DTF printing can throw curveballs. Here are a few issues I've encountered and how to fix them.
- Ink bleeding: This often happens when the film is not compatible with your printer or when too much ink is laid down. Try reducing ink density or switching to a higher-quality film.
- Powder not sticking: If the ink dries too quickly, the powder won't adhere. Work in a humid environment or print with a higher ink volume to keep the ink wet longer.
- Cracking after washing: This usually indicates undercuring or insufficient pressure during transfer. Increase curing time or pressure, and always follow the wash care instructions.
- Dull colors: Ensure you're using the correct ICC profile for your printer and film combination. Also, check that your white ink layer is opaque enough.
Choosing the Right Supplies
The quality of your DTF supplies directly impacts your results. Not all films are created equal; some have a coating that releases better, while others are prone to static. For powders, look for a fine, consistent particle size (typically 80-200 microns) to ensure smooth adhesion. Inks should be specifically formulated for DTF printing, as regular pigment inks may clog printheads or produce poor color vibrancy.
When sourcing supplies, consider your production volume. If you're just starting, a desktop DTF printer with roll film might suffice. For higher volumes, a larger format printer and an automatic powder shaker can streamline your workflow. Always test new supplies with a small batch before committing to a large order.
DTF vs. Other Printing Methods
How does DTF stack up against screen printing, DTG, and vinyl? Here's a quick comparison.
- Screen printing: More cost-effective for large orders of simple designs, but setup costs are high and color matching can be tricky.
- DTG (Direct to Garment): Best for 100% cotton and low-detail designs, but colors may appear faded on dark shirts without a pretreatment.
- Heat transfer vinyl: Great for single-color, simple shapes, but weeding is time-consuming and layered vinyl can feel heavy.
- DTF: Excels at full-color, detailed designs on almost any fabric, with no weeding and minimal setup. It's ideal for small businesses offering personalized products.
Frequently Asked Questions About DTF Printing
What fabrics can I use with DTF transfers?
DTF transfers work on cotton, polyester, cotton-poly blends, spandex, leather, and even some nylons. However, fabrics with a heavy weave or waterproof coating may require a special adhesive powder. Always test on a scrap piece first.
How do I wash a DTF-printed garment?
Turn the garment inside out and machine wash in cold water with mild detergent. Avoid bleach and fabric softeners. Tumble dry on low or hang dry. Do not iron directly on the print; if needed, iron inside out on a low setting.
Can I use a regular inkjet printer for DTF?
No, standard inkjet printers are not suitable because they use different inks and lack the necessary white ink channel. You need a dedicated DTF printer that uses pigment inks and has a white ink circulation system.
How long does a DTF transfer last?
With proper application and care, a DTF transfer can last 50 washes or more. The key is achieving a full cure and following wash instructions. Some users report longevity comparable to screen printing.
Do I need a special heat press for DTF?
Any heat press that reaches 325°F (160°C) and provides consistent pressure will work. A clamshell or swing-away press is fine. Just ensure the pressure is even across the platen.
Mastering DTF printing opens up a world of creative possibilities. Whether you're decorating team jerseys, custom t-shirts, or promotional items, the technique offers unmatched flexibility. With a bit of practice and attention to detail, you'll be producing professional-quality transfers in no time. Remember to experiment with different films and powders to find the combination that works best for your shop. Happy printing!